Affiliate Disclosure: This post contains Amazon affiliate links. As an Amazon Associate, Glow Protocol earns from qualifying purchases. If you purchase through our links, we earn a small commission at no extra cost to you. We only recommend products we have researched and believe in.
Skincare Layering Order: The Right Way to Apply Products After 30
I used to think skincare was just about finding the right products. I’d buy a serum here, a moisturiser there. Slather them on my face in whatever order made sense at the time. Hope for the best.
It didn’t work.
When I hit my early thirties, my skin started acting completely differently. Suddenly, the products I loved weren’t delivering results anymore. I was getting breakouts, my skin felt tight, and nothing seemed to absorb properly. I blamed the products. I blamed my genetics. I blamed the universe.
Then I realised the real culprit. I had no idea about skincare layering order.
This is the part nobody talks about enough. Everyone obsesses over which serum is best or whether they need a jade roller. But the order in which you apply your products? That’s the part that decides whether anything works at all. It’s literally the difference between your skin absorbing the good stuff and those expensive serums sitting on the surface doing nothing.
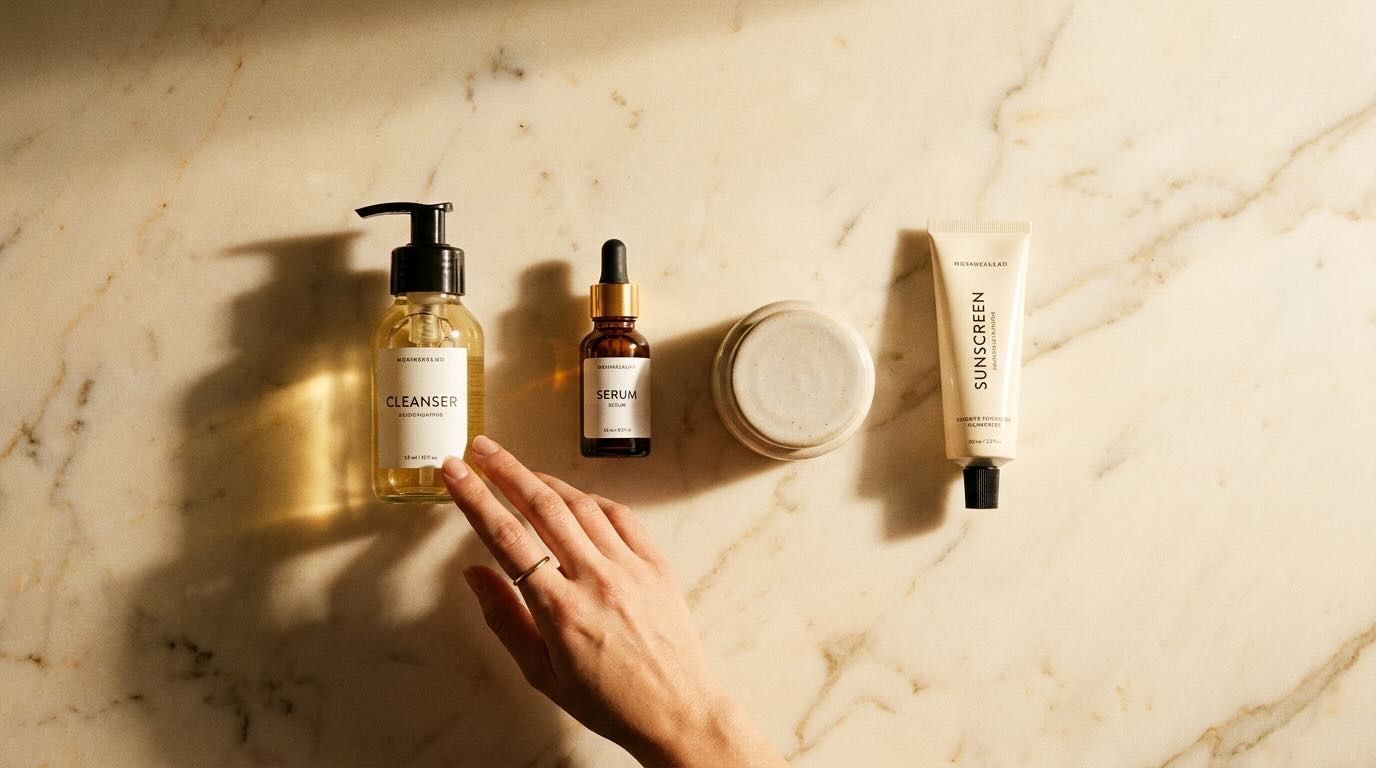
Here’s the skincare layering order principle in a nutshell: you apply products from thinnest to thickest consistency. Why? Because thicker products create a barrier that prevents lighter products from penetrating. Apply a heavy moisturiser first, then try to get a hydrating serum to absorb, and you’re essentially locked out. The serum sits on top of the moisturiser and goes nowhere.
But there’s more to it than just consistency. You also need to think about pH levels, active ingredients, and how different components interact with each other. Some actives are fighting for your skin’s attention, and if you layer them wrong, you neutralise them. Others need a specific pH to work effectively. Get this wrong, and you’re spending money on products that might as well be window dressing.
When I finally understood skincare layering order, my entire routine changed. My skin after 30 transformed. Products actually started working. My skin felt better. I looked better. And honestly, I started needing fewer products because the ones I had were actually penetrating and doing their job.
That’s what this guide is about. I’m going to walk you through exactly how to layer your skincare, both morning and night, so you can actually get results from your routine. Whether you’re just starting out or you’ve been doing your routine wrong for years, this will change how you think about your skincare.
Not Sure Where to Start With Layering?
Take the 2-minute skin quiz to get a layering order matched to your skin type, concerns, and the products you already own.
The Morning Skincare Layering Order: Step by Step
Let’s start with your morning routine because this is where most people actually stick with a schedule. You’re already brushing your teeth and getting ready, so adding five minutes of proper skincare layering is totally doable.
Your morning routine has a specific job: protect your skin and prepare it for the day ahead. You’re not trying to transform your skin in the morning (that’s what night is for). You’re trying to cleanse, hydrate, and protect. Here’s the exact skincare layering order for the morning:
Step 1: Cleanse
Always, and I mean always, start with a clean canvas. I use a gentle cleanser in the morning because I’m not trying to strip my skin. Even if your skin feels clean when you wake up, there’s still dead skin cells, bacteria, and leftover products from your nighttime routine sitting on your face.
I reach for the CeraVe Hydrating Facial Cleanser every single morning. It’s around $16, and it removes everything without that squeaky-clean feeling that tells you your skin is stripped. You need a cleanser that respects your skin barrier, because if your barrier is compromised, nothing else you do matters.
CeraVe Hydrating Facial Cleanser
~$16Contains ceramides and hyaluronic acid. Low-pH, non-stripping. Respects your skin barrier.
Massage your cleanser onto damp skin for about 30 seconds, then rinse with lukewarm water. This shouldn’t be aggressive. You’re not trying to sand off your face. Just be gentle and thorough.
Step 2: Tone or Essence (Optional but Helpful)
A lot of people skip this step, and that’s fine. But I found that adding a hydrating toner or essence after cleansing actually helps my other products absorb better. It gives your skin that extra bit of hydration and helps with pH rebalancing after cleansing.
If you use a toner, apply it to slightly damp skin with a cotton pad or by patting it in with your hands. The goal here is hydration, not astringency. Save that for the nighttime if you need it.
Step 3: Serums and Actives
This is where things get interesting. In the morning, I typically keep serums lighter because you’re about to apply SPF, and you don’t want too many layers creating occlusion issues. But if you have a serum you love, this is when you use it.
Serums are thinner than moisturisers, so they go on now, while your skin is still slightly damp. They’ll absorb better this way. I often use the The Ordinary Niacinamide 10% + Zinc 1% in the morning because niacinamide is excellent for morning skin. It calms inflammation, minimises pores, and supports your skin barrier. At around $6, it’s hard to beat the value.
The Ordinary Niacinamide 10% + Zinc 1%
~$6Calms inflammation, reduces pore appearance, supports barrier function. Plays well with almost everything.
Use just a few drops and pat into your skin. Let it dry completely before moving to the next step. You’ll know it’s ready when your skin feels matte and no longer wet.
Step 4: Eye Cream (Optional)
The skin around your eyes is delicate and deserves special attention, especially after 30 when fine lines start becoming a concern. This step is totally optional, but I personally use an eye cream because that area needs extra care.
Use a tiny amount, seriously the size of a grain of rice, and gently pat it around the orbital bone. Don’t tug or pull at the skin. This should be the most gentle part of your routine.
Step 5: Moisturiser
Now we’re at moisturiser. This is thicker than your serums, so it goes on now to seal everything in. I use the CeraVe Moisturising Cream in the morning because my skin needs that extra hydration. It’s around $16, and it’s packed with ceramides that keep your skin barrier healthy.
CeraVe Moisturising Cream
~$16Ceramide-rich, MVE slow-release system. The benchmark for barrier-support moisturising at any price.
Use a pea-sized amount and warm it between your palms before pressing into your skin. Don’t drag or rub, just press gently until it’s absorbed. Massaging can actually disrupt the ingredients you just applied.
Step 6: SPF
This is non-negotiable. SPF is literally the only product proven to prevent visible ageing, and I’m not exaggerating. Every single day, you need SPF 30 or higher. I use EltaMD UV Clear SPF 46 because it’s lightweight, it doesn’t leave a white cast, and it sits nicely under makeup or on its own. It’s about $39, and honestly, it’s the best investment you can make in your skin.
Apply it last, after everything else has fully set. Use about a quarter teaspoon for your face. If you’re still figuring out which sunscreen to pick, read my complete guide on the best sunscreen after 30.
EltaMD UV Clear SPF 46
~$39Broad spectrum, no white cast, non-comedogenic. Plays well over actives. Water-resistant 80 minutes.
The Night Skincare Layering Order: Step by Step
Your nighttime routine is where the real work happens. While you sleep, your skin is repairing itself, regenerating cells, and getting ready for tomorrow. This is when you can use stronger actives, heavier moisturisers, and ingredients that might be too much for daytime.
Your night routine has a completely different job than your morning routine. You’re trying to repair, regenerate, and hydrate intensively. Here’s the exact night sequence:
Step 1: Cleanse (Double Cleanse)
I do a double cleanse at night. First, I use an oil-based cleanser or micellar water to remove makeup, sunscreen, and oil-soluble impurities. Then I follow with my gentle water-based cleanser to remove any residue.
The second cleanse is the CeraVe Hydrating Facial Cleanser again. This removes water-soluble dirt, bacteria, and any remaining residue. Your skin needs to be completely clean before you apply active ingredients, or those actives won’t work properly and you might trap bacteria under your other products.
Pat dry with a clean towel, leaving your skin slightly damp for the next step.
Step 2: Toner or Essence
Just like in the morning, a hydrating toner or essence helps with absorption. Apply to damp skin and let it absorb completely. This creates the perfect base for your actives.
Step 3: Actives (Exfoliants, Retinol, Vitamin C)
This is where your nighttime routine gets powerful. After cleansing and toning, your skin is primed and ready for active ingredients. These are the products that actually transform your skin. Chemical exfoliants, retinol, vitamin C, peptides. Whatever your skin needs.
I rotate between different actives depending on what my skin needs that week. Some nights I use the Paula’s Choice 2% BHA Liquid Exfoliant to clean out my pores and prevent breakouts. At around $35, it’s one of the best BHAs on the market. Other nights, I use the The Ordinary Retinol 0.5% in Squalane for collagen-boosting, anti-ageing benefits. It’s only about $8 and works beautifully when you layer it correctly.
Paula’s Choice 2% BHA Liquid Exfoliant
~$35Salicylic acid, oil-soluble, exfoliates inside the pore. Anti-inflammatory. The reference BHA at this price.
The Ordinary Retinol 0.5% in Squalane
~$8Stable retinol in a soothing squalane base. Boosts collagen, smooths texture. Gentle introduction to retinoids.
Let your active fully absorb before moving to the next step. This usually takes 5 to 10 minutes. Your skin should feel completely dry and matte before you apply anything else on top.
Step 4: Serums and Treatments
After your active has fully absorbed, this is when you can layer additional serums. These might be niacinamide (which plays well with most ingredients), hyaluronic acid for hydration, or peptide serums for firmness. This is where you can get strategic based on what your skin needs.
Apply serums while your skin is still slightly damp from the previous step. They’ll absorb better this way.
Step 5: Eye Cream
Apply the same way as in the morning. A tiny amount, patted gently around the orbital bone. The night is a good time for a richer eye cream if your eyes get dry.
Step 6: Moisturiser
The night is when you can use a richer, heavier moisturiser than you might use in the morning. I use the CeraVe Moisturising Cream at night too, but sometimes I’ll swap it for something even richer depending on my skin’s needs. This step seals in all the actives and serums you just applied.
Use a pea-sized amount and press gently into your skin. Let it fully absorb before getting into bed.

Want a Layering Routine Built for Your Skin?
Mineral or chemical SPF, retinoid or AHA, fragrance-free or rich, the right answer depends on your skin. The 2-minute quiz tells you which.
Where Actives Fit Into Your Skincare Layering Order
This is the part that confuses most people. You have all these actives, and you’re not sure which ones to combine and which ones to keep separate. Here’s the honest truth: not all actives play nicely together, and if you layer them wrong, you’ll either irritate your skin or neutralise their effectiveness.
First, understand what each active does. BHAs (beta hydroxy acids) like salicylic acid are oil-soluble, which means they penetrate into your pores. AHAs (alpha hydroxy acids) like glycolic acid are water-soluble and work on the skin surface. Retinol is all about boosting collagen and cell turnover. Vitamin C is an antioxidant that brightens and protects. They all have different jobs.
Here’s my rule: never combine two actives on the same night when you’re starting out. Your skin needs to build tolerance, and combining actives is the fastest way to compromise your skin barrier. Start with one active, use it consistently for a few weeks, and only then think about adding another.
When you do start combining, here’s what works together and what doesn’t:
Retinol + Niacinamide: This is a great combination. Niacinamide actually supports your skin barrier and reduces the irritation that retinol can sometimes cause. Use the retinol first, wait for it to absorb, then apply your niacinamide. Read my full guide on niacinamide after 30 to understand why this combination works so well.
BHA + AHA: You can use these together, but start slow. Use them on alternate nights until your skin adjusts. When you do combine them, apply the BHA first (since it needs a lower pH), wait 20 minutes, then apply the AHA. But honestly, I usually just rotate them. BHA one night, AHA the next. It’s gentler.
Retinol + AHA/BHA: This is a strong combination. Don’t do this every night. I recommend using retinol on some nights and AHAs/BHAs on other nights, rotating them. If your skin is very tolerant and well-adjusted, you can try it occasionally, but be prepared for potential irritation.
Vitamin C + Retinol: These can technically be used together, but they work best at different times of day. Vitamin C is great in the morning for antioxidant protection, and retinol is best at night for cell turnover. If you want to use both, apply vitamin C in the morning and retinol at night.
Niacinamide + Everything: This is the easygoing ingredient that plays nicely with basically everything. You can layer niacinamide with retinol, with AHAs, with BHAs, with vitamin C. It’s genuinely one of the most versatile actives you can use.
The key principle is this: actives work best when you introduce them slowly and layer them thoughtfully. Your skin barrier is your most important asset after 30, so protect it by not overdoing it with too many actives at once.
The 5 Most Common Skincare Layering Order Mistakes
I’ve made every single one of these mistakes, and I want to save you from the same frustration I experienced. Here are the layering errors that actually prevent your skin from improving:
Mistake #1: Layering Thick Products First
This is probably the most common mistake. You apply a heavy moisturiser first, then try to layer a hydrating serum on top. The serum just sits there, not absorbing. Your skin barrier blocks it from going deeper because there’s already an occlusive layer in the way.
Always go light to heavy. Serums, toners, and aqueous treatments first. Thicker creams and oils last. If you get this wrong, you’re wasting money on products that aren’t actually doing anything.
Mistake #2: Not Waiting for Products to Dry Between Layers
I used to layer products as fast as possible, thinking it would save time. Wrong. When you apply the next product before the previous one has fully absorbed, you dilute the ingredients. That expensive serum you’re using? You just made it less potent by layering something damp on top of it.
Give each product time to absorb. Wait until your skin feels matte and completely dry before moving to the next step. This usually takes 5 to 10 minutes per product. Yes, it takes longer, but you’re actually getting results instead of creating a wet, ineffective mess on your face.
Mistake #3: Combining Actives Without a Buffer
Using multiple actives on the same night is asking for trouble. You’ll either irritate your skin or reduce the effectiveness of one or both actives. If you’re going to use multiple actives, always buffer them. This means applying a hydrating product between them to reduce irritation.
For example: apply your BHA, let it dry, then apply a hydrating toner or serum before applying your retinol. The buffer protects your skin and reduces irritation significantly.
Mistake #4: Applying SPF Over a Damp Face
SPF needs to form a protective barrier on your skin, and it can’t do that if your skin is wet or damp. If you apply SPF over damp skin or moist products, it doesn’t spread evenly, you get uneven protection, and you’re basically wasting your SPF.
Always wait until your moisturiser is completely absorbed before applying SPF. If it helps, use your SPF as the absolute last step, 5 to 10 minutes after your moisturiser. Your skin will thank you.
Mistake #5: Ignoring Your Skin Barrier
You can layer the most expensive actives in the world, but if your skin barrier is compromised, none of it matters. A weak barrier means inflammation, sensitivity, breakouts, and accelerated ageing. You’re literally working against yourself.
Your skin barrier is made of ceramides, fatty acids, and cholesterol. When you use too many actives or combine them poorly, you strip these away. Always include ceramide-rich products in your routine. The CeraVe products contain ceramides, and niacinamide also supports barrier health. Prioritise barrier health above everything else.

How to Build Your Personal Skincare Layering Order After 30
Now that you understand the principles, let’s talk about how to actually build a routine that works for your specific skin. Everyone’s skin is different, and what works for me might not work for you. Here’s how to create your personal skincare layering order:
Step 1: Start with the Basics
Don’t get fancy right away. Start with a simple routine: cleanser, moisturiser, and SPF in the morning. Cleanser and moisturiser at night. Use this for two weeks. Your skin needs to adjust, and you need to see how these basic products work for you before you add anything else.
Step 2: Identify Your Biggest Skin Concern
Is it acne? Ageing? Dryness? Dullness? Pick one. After 30, you can’t fix everything at once, and honestly, trying to do too much makes your skin worse. Pick your biggest concern and add one product to address that.
If it’s acne, add a BHA like Paula’s Choice. If it’s ageing, add a retinol. If it’s dryness, add a hydrating serum or toner. One product. Give it 4 to 6 weeks to see results. Your skin is always a work in progress, and patience is more important than having ten products.
Step 3: Layer Strategically Based on Consistency
Once you’ve added that one product, layer it correctly. If it’s a serum, apply it before your moisturiser. If it’s an oil, apply it last. If it’s an exfoliant, apply it after cleansing, let it fully absorb, then apply your other products.
Remember: light to heavy, always. Liquids and serums first, creams and oils last.
Step 4: Introduce New Products Slowly
Once the first product is working (after 4 to 6 weeks), you can add a second product. But don’t add multiple new products at once. Add one, wait 2 to 3 weeks, see how it works, then add the next. If your skin reacts badly, you’ll know exactly which product caused it.
Step 5: Test Before You Fully Commit
New product? Use it on a small area first. Use it every other night before using it daily. Your skin will tell you if something isn’t working. Listen to it. Red, itchy, irritated skin is not normal, and you don’t need to push through it. Back off, give your skin time to calm down, then try again at a lower frequency.
After 30, your skin is more sensitive than it was in your twenties. Respect that. Gentleness isn’t weakness. It’s wisdom.
The Honest Bottom Line
Skincare layering order isn’t complicated once you understand the basic principle: apply products from lightest to heaviest, let each one fully absorb, and give your skin barrier the respect it deserves. That’s it. That’s the whole secret.
The products you use matter, obviously. But honestly? Your $6 niacinamide serum layered correctly will do more for your skin than a $200 serum applied in the wrong order. The order is half the battle. Maybe more than half.
Everything changes after 30. Your skin changes, your priorities change, and what worked before doesn’t work anymore. That’s not a failure. That’s just skin. The beauty of understanding skincare layering order is that you can adapt your routine to whatever your skin needs at any given time. You’re not stuck with one routine forever. You can experiment, adjust, and evolve.
The goal isn’t to have a perfect routine. The goal is to have healthy, hydrated, protected skin that ages beautifully because you’re actually taking care of it intentionally. Everything else is just details.
Start with the basics, add one active at a time, layer correctly, and be patient. Your skin will improve.

The order in which you apply your skincare matters more than the price tag on the bottle. A $6 serum layered correctly will outperform a $200 serum layered wrong. Every time.
Related Reading
→ The complete guide to skin barrier repair after 30
→ Retinol for beginners: how to start without wrecking your skin
→ Why your moisturiser stings (and what it actually means)
Sources
This guide is backed by peer-reviewed dermatological research on skin barrier function, moisturiser science, and topical actives:
- Draelos ZD. The science behind skin care: Moisturizers. J Cosmet Dermatol. 2018;17(2):138-144. PMID: 29319217. Foundational review on moisturiser formulation and how product vehicles deliver actives to the skin, the basis for the light-to-heavy layering principle.
- Proksch E, Brandner JM, Jensen JM. The skin: an indispensable barrier. Exp Dermatol. 2008;17(12):1063-1072. PMID: 19043850. The reference paper on stratum corneum structure, ceramides, fatty acids and cholesterol as barrier components, and why barrier integrity governs how products perform.
- Bissett DL, Oblong JE, Berge CA. Niacinamide: A B vitamin that improves aging facial skin appearance. Dermatol Surg. 2005;31(7 Pt 2):860-865. PMID: 16029679. Clinical evidence for niacinamide’s role in reducing transepidermal water loss and supporting barrier repair, the reason it layers safely with most other actives.
All studies are published in peer-reviewed journals and freely accessible via PubMed, the US National Library of Medicine’s biomedical literature database.
Not sure where to start with your own skincare layering order?
Take the 2-Minute Skin Quiz
Get a layering order matched to your exact skin type, concerns, and the products you already own. Free, no email required to start.
Get The Weekly Glow Report
Honest product rankings, ingredient breakdowns, and research-backed recommendations for women 30+. Every week. No spam. Just glow.
Glow Protocol · glowprotocol.beauty · Science-backed skincare for women 30+
Affiliate Disclosure: This post contains affiliate links, which means we may earn a small commission if you make a purchase through these links at no extra cost to you. We only recommend products we have researched and believe offer real value. Our opinions remain our own and are not influenced by any brand or compensation.
Affiliate Disclosure: This post contains affiliate links, which means we may earn a small commission if you make a purchase through these links at no extra cost to you. We only recommend products we've researched and believe offer real value. Our opinions remain our own and are not influenced by any brand or compensation.